We can all agree on the following statement:
“Knowing how to use a belt sander is critical to woodworking projects.”
Why? Because it is an invaluable tool to have, especially when fine tuning the shape of the wood pieces that you are using.
A woodworking or a building project is not an easy thing to take on. You need the right tool for every small job, and the wood itself does not make it easier. This is because wood is the easiest material to work with and modify. As a result of that, it is also easy to damage and ruin the piece that you are working on, especially when fine tuning it.
This is where the belt sander comes in and although it is an invaluable tool to have, you need to know how to use it properly beforehand.
What Is A Belt Sander?
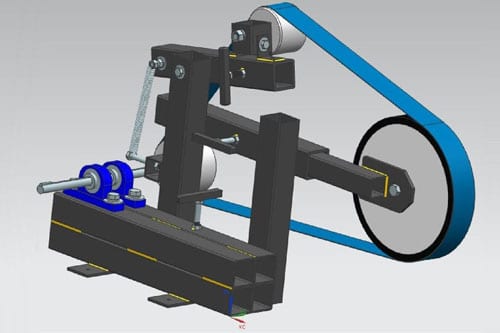
Simply put, a belt sander is for wood what a file is for metal. It uses friction and an abrasive material in order to shave off the surface of the wood.
This in turn sands down the wood, leaving it nice and smooth. It is also used to round off edges, smooth out openings and remove any unwanted paint or varnishing.

The main actor here is the abrasive belt, which moves around 2 drums which are powered by a small electric motor. A belt sander relies on its weight and the speed of the belt in order to shave off as little or as much as possible.
While it is possible to adjust the speed on some sanders, there is no way to adjust the weight properly.
This means that you will have to be very careful when maneuvering the belt sander. Make sure that your fingers are nowhere near the belt and that you are wearing the proper safety equipment (gloves, goggles, mask and earphones) at all times.
Using The Belt Sander
This tool is a bit dangerous to use and it can cause accidents. However if you take the proper precautions and follow the proper steps you will be just fine.
1. Prep The Wood
Grab the piece of wood that you will be working on. Clean it up using a dry rag, removing any excess dust or grime. If there are nails present in the wood, grab a claw hammer or a set of pliers and take them out being careful not to damage the shape.

Once the wood is clean and there is no dirt or foreign objects on it, secure it tightly to the work bench. Make sure that the side that you will be sanding is facing up.
2. Gear Up
This step is all about safety. There will be a lot of sawdust and a lot of small splinters flying all over the place when you use a belt sander, so you need to dress accordingly.
Grab a pair of thick gloves in order to protect your hands from any irritating dust or splinters. The gloves also help you keep a tighter grip on the handle.
Next put on a small mask over your nose and mouth in order to not inhale the dust by accident. Slide a pair of goggles over your eyes because there will be dust and splinters flying towards them at some point.
Finish it off by putting on a pair of headphones to protect your ears from the loud noise that the tool makes.
Even if your belt sander comes with a collection bag, it is still wise to be cautious and protect yourself.
3. Check And Start The Belt Sander
Before you can use a belt sander you first have to check and see if it is in working condition. Make sure that the belt is not worn out and that it is the appropriate coarseness for the job.

Once that checks out, start it up while holding the belt sander away from the wood. Rev it up to maximum power a couple of times to make sure that everything is working properly.
4. First Contact
Start the belt sander using a low speed and a low number of revs, away from the wood. While it is running, bring down the rear part of the belt gently until it makes contact with the wood. The sander will try and jump forward so keep a firm grip on the handles.
Once the rear part of the belt touches the piece of wood, start moving it forward gently while at the same time bringing the front part of the belt down onto the wood. Keep pushing the belt sander forward along the shape of the wood with a stable motion.
Do not rock it back and forth and do not, under any circumstances, stop moving the sander.
Congratulations, you are now sanding.
5. Sanding Off The Top Layer
This is done using a very coarse belt on your sander.
Start the belt sander, bring it down gently on top of the wood piece and move it forward with a slow and stable motion. The jagged top layer of the wood will be removed, exposing the grain.

This process will also remove any splinters and any rough patches in the wood. It is also the most dangerous part, the sander will fight you all the way through. Make sure to keep a tight grip on the handles.
Sand it off evenly without leaving any spots or crests.
6. Detailing
Switch the belt out with a fine grit one and start sanding the wood piece again.
This time use higher speeds and revs, making the belt spin faster and sand off a lot finer.
By doing this, you are sanding off the grooves and jaggedness from the grain, leaving behind a nice luster and a very smooth surface.
Again, make sure that you sand the entire surface evenly.
7. Rounding Off Edges
Lastly, if you so desire, you can round off the edges of the piece of wood that you are working on. Besides being more pleasing, you also remove any splinters and get rid of sharp jagged edges giving it a nice clean shape.
Simply turn the wood on its side, start the sander and rotate it at an angle so that it lands flat on the edge. Sand the edge down until you are comfortable and pleased with the result.
In conclusion
Sanding is an important and integral part of woodworking.
It makes working with wood a lot easier, it gives it a nice luster and it allows you to work a lot more neatly.
You can either take the manual approach and do it by hand, or use a power tool and make your life easier.
Instead of having to use sand paper and sanding the wood by hand, with this guide you can use a belt sander and save a lot of time and a lot of effort while working on your woodworking or building project.